
Chocolate Babka
How to make Chocolate Babka - Rich sweet bread with swirls of dark chocolate
Servings 2 Loaves
Calories 2539kcal
Equipment
- Oven
- 2 9 × 5-inch loaf pan
Ingredients
- 3 ½ Cups All Purpose Flour All purpose flour or Refined White Flour(read notes)
- 2 teaspoon Instant Active Yeast
- 2 teaspoon Salt Reduce if using Salted Butter
- 1 tablespoon Sugar
- 2 tablespoon Butter Unsalted, Cold
- 2 Eggs
- ¾ cup Milk 180 ml, Lukewarm ; plus 1–6 tablespoons as needed
Filling( for 2 babka loaves )
- 10.5 oz Chopped Chocolate* 300 g dark or semisweet chocolate, finely chopped — 5.25 oz (150 g) per loaf
- 10 tablespoon Softened Butter 5 tablespoon per loaf
Syrup
- 2 oz Water ¼ cup
- 2 oz of Sugar ¼ Cup
Instructions
Kneading Using a Stand Mixer(Option 1)
- Add the flour, yeast, salt, sugar and cold butter in the bowl of a Stand Mixer / food processor/ Dough maker.
- Pulse till the butter disintegrates and mixes with the flour.(but you should see the specks)
- Now on low speed, using the dough hook, Add the eggs one by one.
- Trickle in the ¾ cup of milk . The dough should start to come together now. Process for 1 minute. If it seems to dry add 1 tablespoon of milk in increments till you get a soft dough.
- Take the dough out.
Kneading with Hand(Option 2)
- Mix in the flour, yeast,sugar and salt in a large sturdy bowl.Add the cold cubed butter.
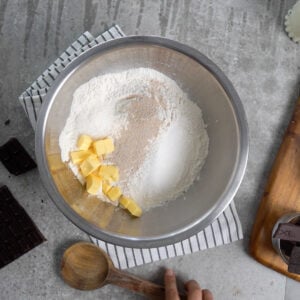
- Now pinch the butter with your index finger and thumb and mix it with the flour.Rub the butter in the flour till you don't have any big cubes of butter left but small clumps of it.
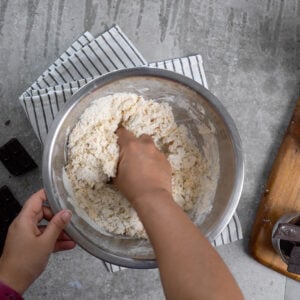
- Add the eggs and ¾ cup milk. Start by mixing and wetting all the ingredients. Once the dough starts to come together , add more milk in 1 tablespoon increments if the dough is dry or if it's too wet add more flour.
- Knead the dough well for about 10 minute. Stretch and fold..and Repeat.This is done to develop Gluten.If this step is omitted the bread will be chewy instead of pillowy.
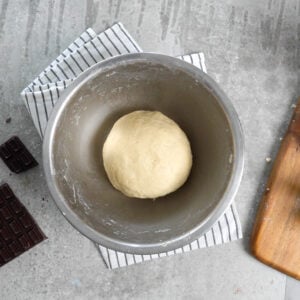
Proofing the Bread
- Use a large greased bowl for this step. It should be big enough to fit a triple amount of the dough.
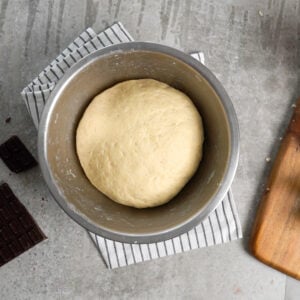
- The quick way is to keep the kneaded bread in a bowl, covered with wet kitchen towel for 2-4 hours.
- The easier way is to keep the dough in a covered bowl(use cling film) in the fridge for 8-10 hours.
Rolling the Dough and last proof
- If in the fridge,Take the dough out of the fridge and let it come to room temperature.
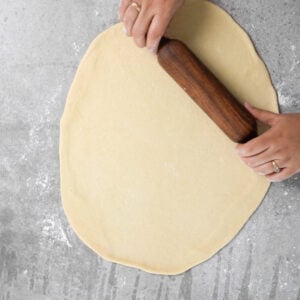
- Knead the dough for 2 minutes to make it pliable.Divide it into two halves.
- Make a Ball of the one halve and roll it into a rectangle. About ¼ inch thick, approximately 10 × 14 inches.
- Spread the butter in the rectangle by leaving 1 inch space.Sprinkle the chopped Chocolate.Roll it from the longer side to make a long log.
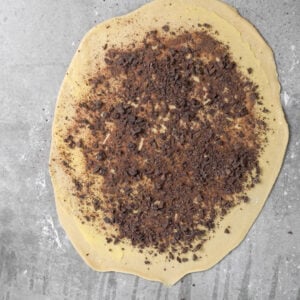
- Optional step : Keep it in the fridge for 10 minutes to make it easier to cut.
- Cut the log along it's length and then braid it. Take one over the other alternatively. Tuck the ends under. Lift this into a prepared loaf pan lined with parchment paper. Cover again with cling film or damp kitchen towel.
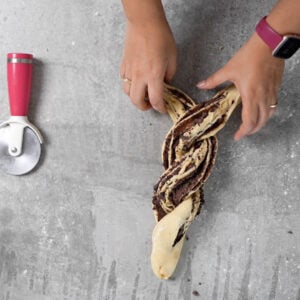
- Let it rise for another 30 min-1 hour.
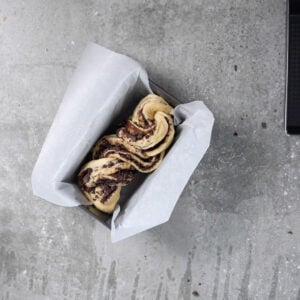
Baking
- Preheat the oven to 180 degrees Celsius or 356 F.
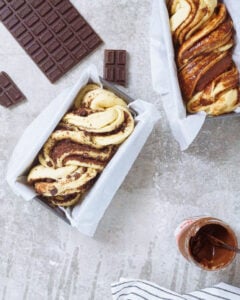
- Bake the babka in the oven for about 35-40 minutes.
- Bread is done if the skewer inserted comes in clean.Also when you knock on the back of the bread and it feels hollow. Finished internal temperature: around 190–200°F
Syrup
- Make this ahead of time so that it can be brushed over the bread as soon as it's out of the oven.
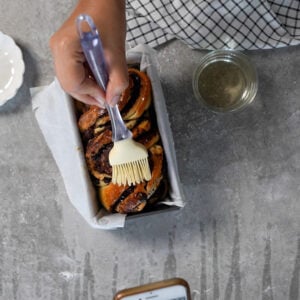
- Heat the sugar and water in a sauce pan together till the sugar crystals dissolve and the syrup thickens.
- Brush it generously over the babka for the beautiful glossy look.
Video
Notes
- Chocolate: Use 300 g / 10.5 oz chocolate for 2 loaves, or 150 g / 5.25 oz per loaf. 50 % dark chocolate works best. I prefer chopped chocolate over chocolate chips or baking chocolate because it melts and spreads more evenly.I also like to have some fine, small and relatively larger chunks. They create a great textural contrast.
- Milk: Start with the lower quantity of milk and add more only if needed. Flour absorbs liquid differently depending on the brand, humidity and weather. The dough should be soft and slightly tacky, but not wet.
- Yeast: If using instant yeast, it can be mixed directly into the flour. If using active dry yeast, bloom it first in lukewarm milk with a little sugar until foamy.
- Butter: Make sure the butter used in the dough is soft, not melted. For the filling, use the consistency specified in the recipe so it spreads easily without leaking out.
- Dough texture: The dough should feel smooth, soft and elastic after kneading. If it is very sticky, resist adding too much extra flour—this can make the babka dry.
- Proofing: Use the dough, not the clock, as your guide. The first rise can take longer in a cool kitchen. The dough should look noticeably puffy and close to doubled in size.
- Shaping: Roll the dough fairly evenly so the layers bake at the same rate. If the dough becomes too soft while shaping, refrigerate it for 10–15 minutes before continuing.
- Filling: Spread the chocolate filling in a thin, even layer, leaving a small border around the edges. Too much filling near the edges can make rolling and sealing difficult.
- Loaf pans: This recipe makes 2 loaves. Divide both the dough and filling equally before shaping.
- Baking: Bake on the middle or upper-middle rack. If your oven has strong bottom heat, place the loaf pans on a light-colored baking sheet to prevent the bottoms from getting too dark.
- If the top browns too quickly: Loosely cover the babka with foil and continue baking until the center is cooked through.
- If the bottom browns too quickly: Move the loaf one rack higher or reduce the oven temperature slightly and extend the baking time.
- Doneness: The babka should be deep golden brown and the internal temperature in the center should be around 190–200°F / 88–93°C. Insert the thermometer into the dough rather than directly into a chocolate swirl.
- Sugar syrup: Brush the syrup over the babka while both are still warm. This keeps the loaf moist and gives it the characteristic glossy finish.
- Cooling: Allow the babka to cool in the pan briefly before transferring it to a wire rack. Cutting it too early can compress the soft crumb. Plus the chocolate would still be melty.
- Storage: Store tightly wrapped at room temperature for about 2–3 days.
- Freezing: Babka freezes very well. Wrap the cooled loaf tightly and freeze for up to 2–3 months. Thaw at room temperature before serving.
Proofing Notes
- Make sure to cover the bread every-time you rest it. You can use a damp cloth or plastic wrap. Some prefer to use a large zip lock bag too.
- The dough will rise faster in a warm place. If you live in a cold place, you can either use the Yogurt option in low on the instant pot or place the covered bowl of dough in a warm water bath.
- To slow down the rise, stick the dough in the fridge. You can let it rise there for about 12-15 hours.
Shaping & Cutting
- Use a pizza cutter to cut the rolled, filled dough with ease.
- The dough plait might not look so pretty at first but it will look nicer once it rises and gets baked. I promise!)
Nutrition
Serving: 1Loaf | Calories: 2539kcal | Carbohydrates: 274g | Protein: 43g | Fat: 141g | Saturated Fat: 83g | Polyunsaturated Fat: 6g | Monounsaturated Fat: 39g | Trans Fat: 3g | Cholesterol: 360mg | Sodium: 2999mg | Potassium: 1518mg | Fiber: 22g | Sugar: 75g | Vitamin A: 2543IU | Calcium: 301mg | Iron: 29mg